Lightning: How I got the shot

Hey friends,
One of my most successful shots of 2020 was also one of the easiest I made during that year. Living by the sea on the south coast of Spain is very peaceful and beautiful, but being on the edge of the sea also brings tempestuous weather. Like most southern European houses, mine has roll-down steel shutters.
On the morning of November 26th I was woken up by my shutters rattling in the frame; just another day on the coast I thought. The shutters were down in the living room overlooking the sea (I had put them down due to the storm warning the previous day) so I pulled them up and was greeted by a dark sky and rolling sea only illuminated by multiple lightning strikes.
My heart jumped! Camera! Camera I need a….Oh, here it is, all setup already from the still life I was shooting the day before. (Zero effort before coffee is always a good thing in my book.)
So here I am still in my pyjamas going onto the balcony with my camera and tripod. It was still 30 minutes before blue hour, leaving astronomical twilight (when the sun is 12 degrees below horizon) and coming into nautical twilight (when the sun is 6 degrees below the horizon).
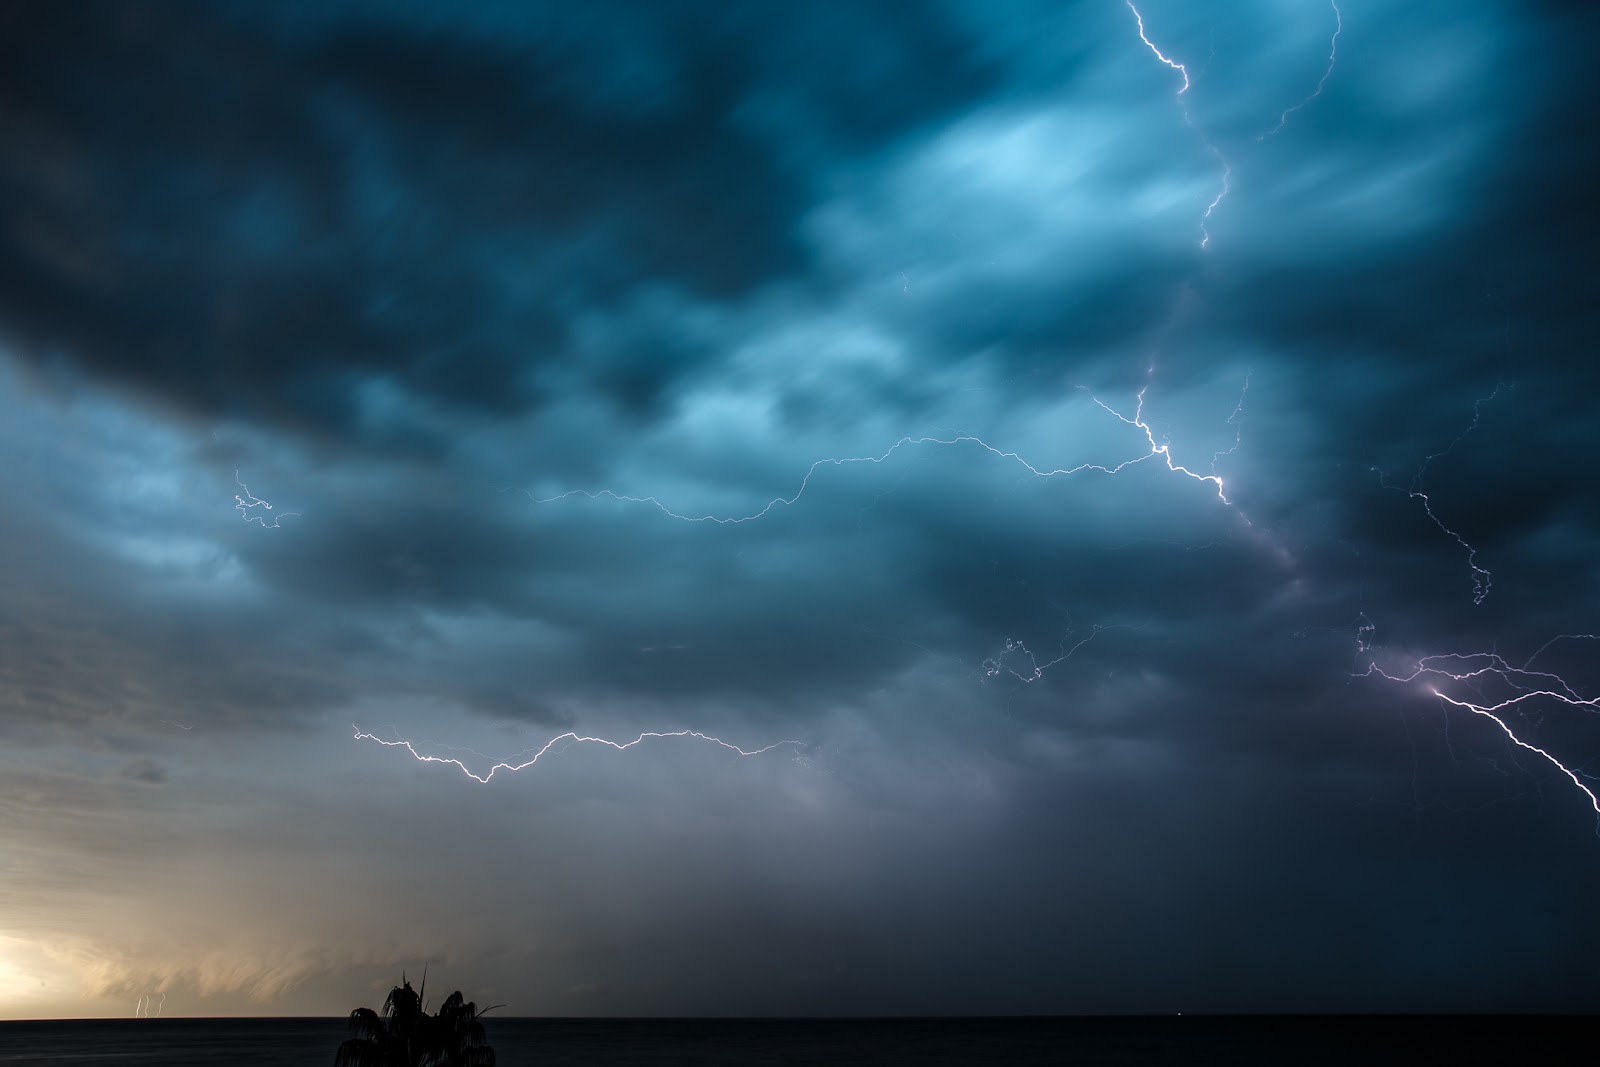
It wasn’t easy framing with barely any light, so I mostly just filled the frame with sky and put it on a timer to take continuous shots. I set the aperture at f/6.3 for 10 seconds as a test shot. This is what I got:

This is NOT sunlight but light from the lightning!
10sec @f/6.3 ISO640
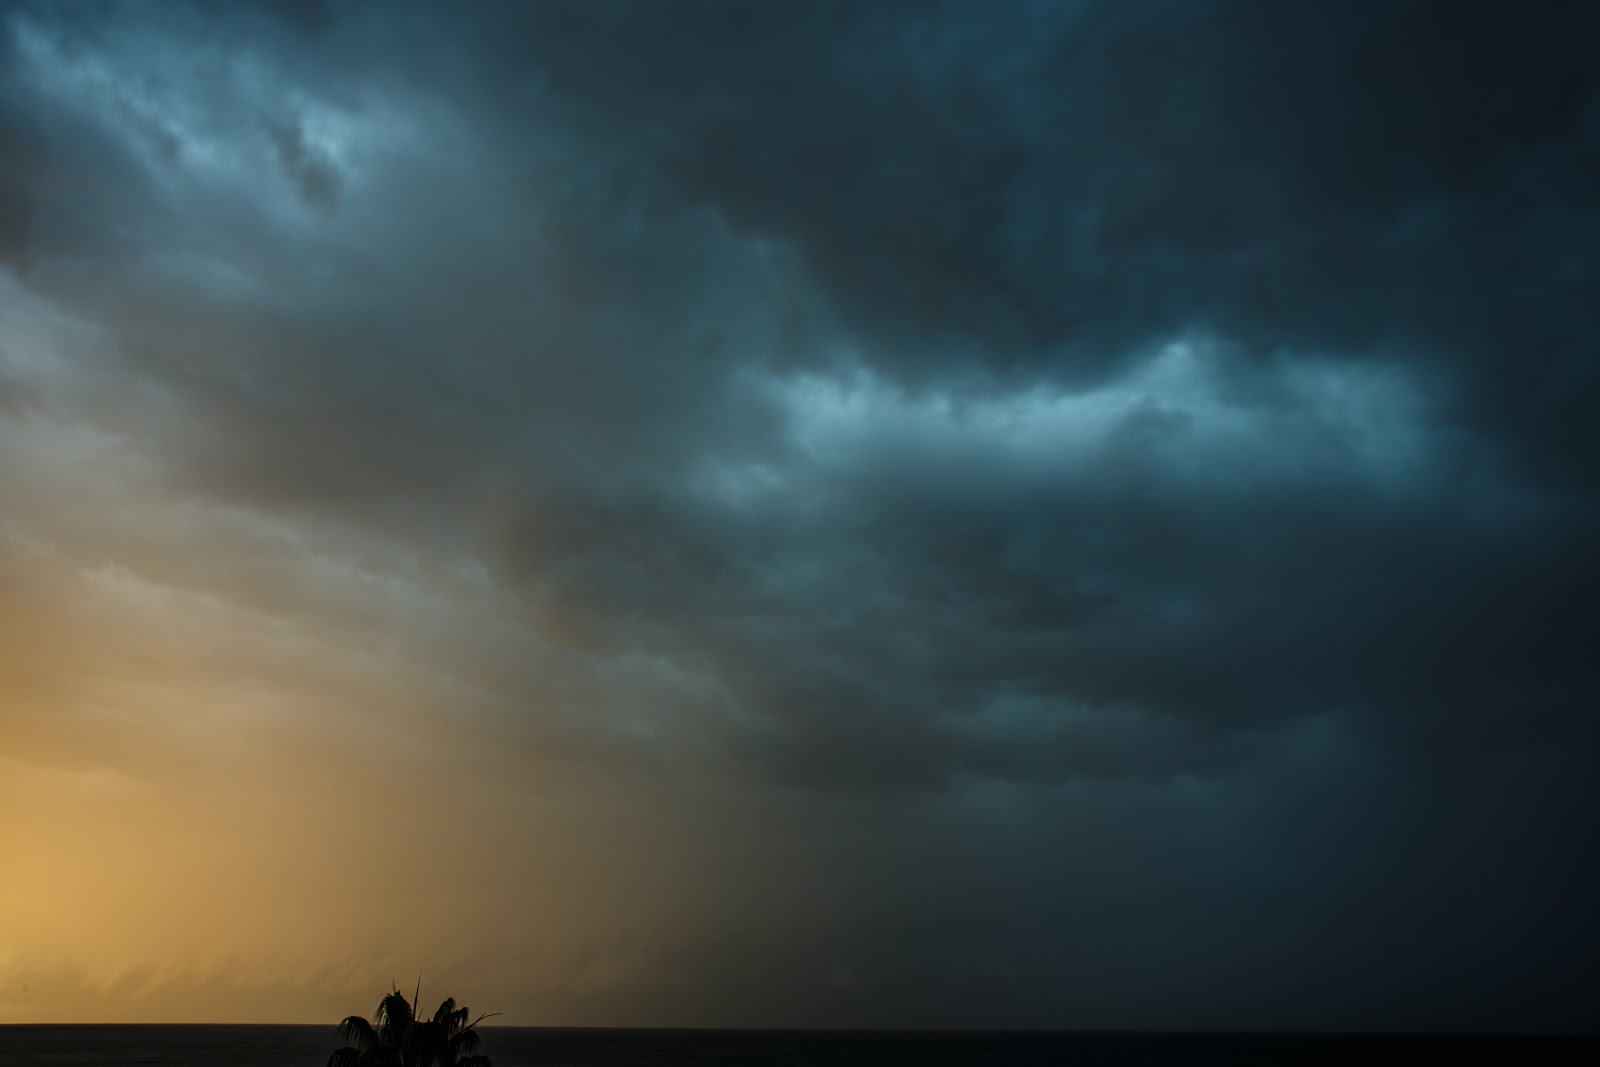
When shooting lightning you don’t want to use small apertures. Why? Because apertures control the INTENSITY of light. And you want the lightning to be intense yes? If you shoot, say at, F/16 then you get thinner, weaker looking lightning. Apertures between 2.8- 8 work best.
This image is actually f/10. But still too skinny and dull.
Once my camera was on the tripod with the 50mm I attached the remote release that I use mostly for timelapses, and set the exposure time for 13 seconds @ f/6.3. Then I went to go make coffee.
After about 3 minutes of exposing, I reviewed (chimped) the images to see what I’d caught. There were loads of good lightning strikes! I made another 2 minutes of exposures adjusting as I went along.
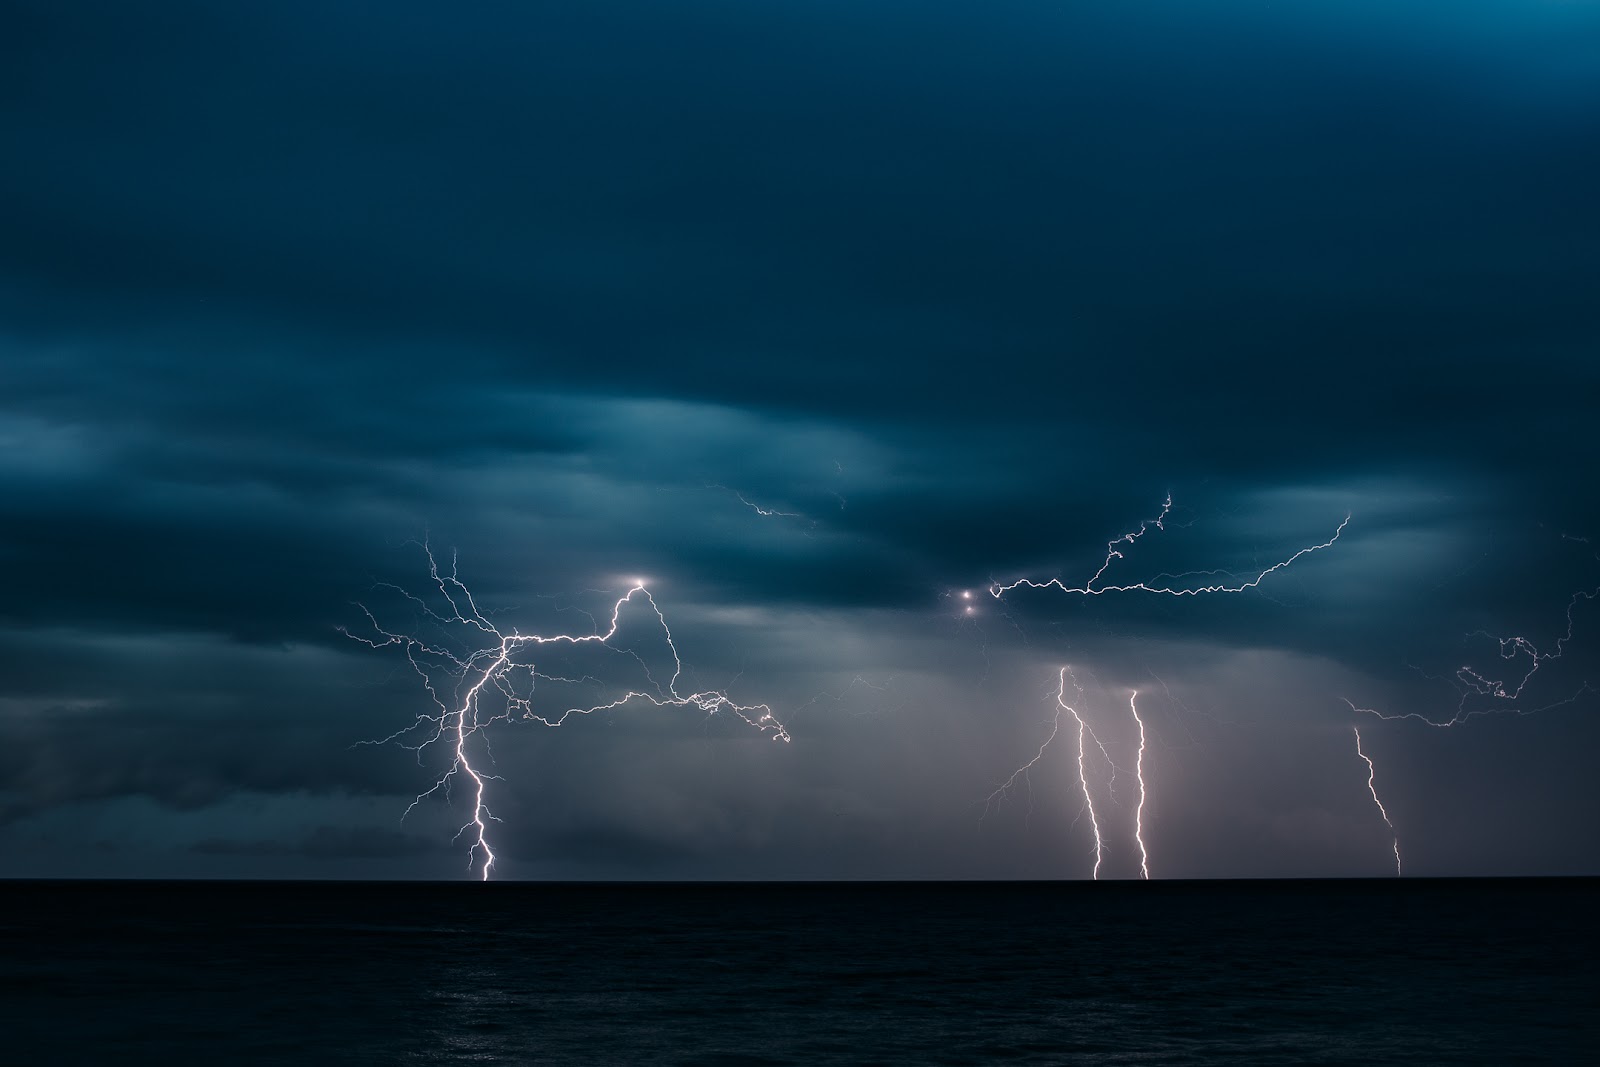
50mm 20sec@ f/5.6 ISO50
The 50mm was working well but as I was shooting the lightning strikes kept getting closer. I mean really close, right overhead – if I had been on the open beach I would have left, that close! But since I was safe on my balcony undercover on the side of a building, I felt secure in my now cold pyjamas… So I switched to a 17mm to achieve more coverage and distort the angle-up perspective a bit.
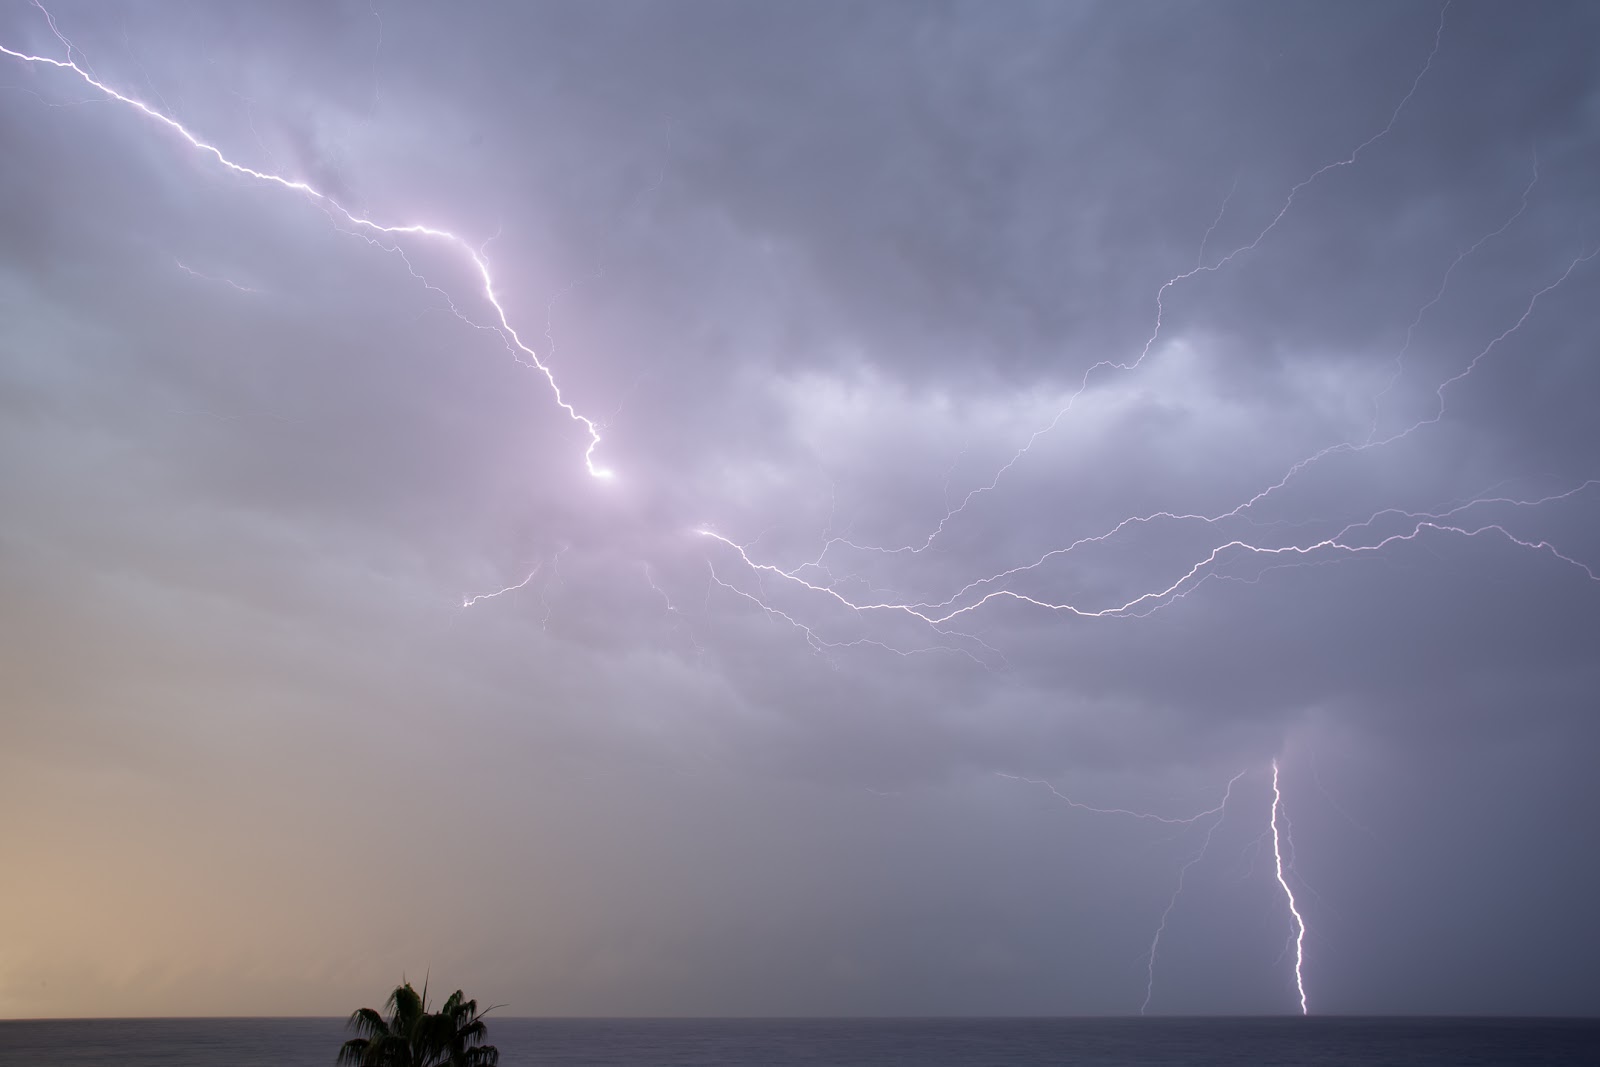
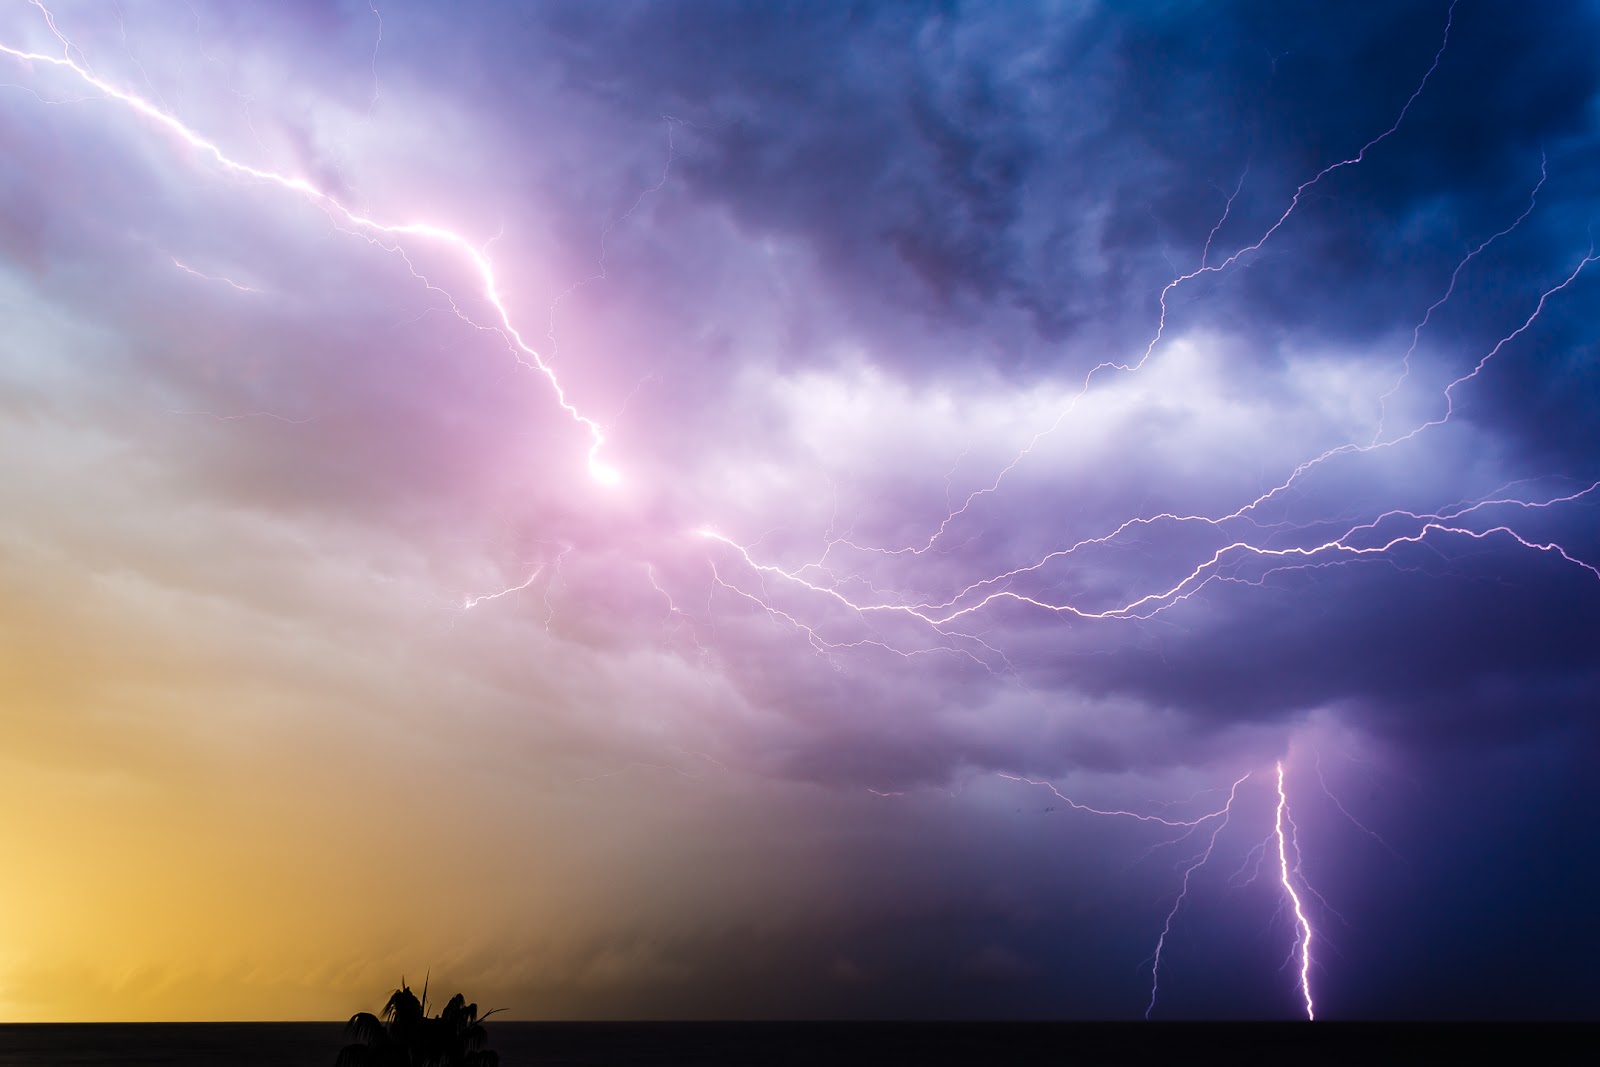
Now that I could see better I reframed to include the top of a tree and the horizon for added perspective. I think without the tree the size and magnitude of the lighting is lost. Now it was just a matter of luck and patience.
2.5sec @f/6.3 ISO50
At this point in time it was blue hour and the sun had just started to warm up the Eastern sky, which you can see in the final shot. I started the remote again with 2.5 second exposures. I was sipping my coffee transfixed by how awesome nature is when bang! A strike so close and so bright.
I was looking right at the space it happened and it burned itself into my retina as I heard my camera shutter go click and I thought: ” Yeah, I got that!” – followed by the instant rumble of deep thunder. Amazing I tell you!
Soon after, the storm moved away and the sunrise came up and I was done.
I reviewed the camera images again and there it was – the perfect strike right on top of me. And I hadn’t even finished my whole cup of coffee yet. A second cup of coffee later and I was sitting at my computer uploading.
A few people have asked me how I processed this image so I will start by showing you the out-of-camera file:
Doesn’t appear so colourful, in fact, it looks rather flat and dull. But don’t judge a file until you have a good look at the histogram. What do you see here?:
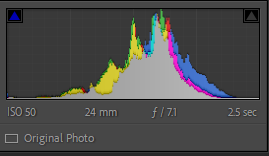
Out-of-camera histogram
Low contrast, yes, to be expected by looking at the file itself. But what I want you to notice are the colour channels of yellow and blue.
That is a lot of yellow towards the darker tones and a lot of blue towards the lighter tones. What this tells me is that I can push these channels and really make the image colourful without making it seem over-processed and fake. I am taking the inherent qualities and enhancing them with saturation and contrast.
And when I do I get a histogram that looks like this:
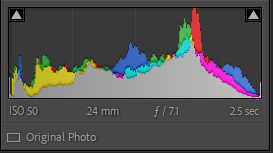
After processing histogram
I have spread all the tones out, increasing contrast. I also upped the vibrance and saturation which you can see in the colour channels.
This is my best processing result but not my first. When I first worked on this image I was into my 2nd cup of coffee the same morning, still hadn’t eaten and was “over-excited”, and when I am “over-excited” I tend to push sliders too far to the right, especially Clarity and sometimes Dehaze (ouch!).
This is what that looks like:
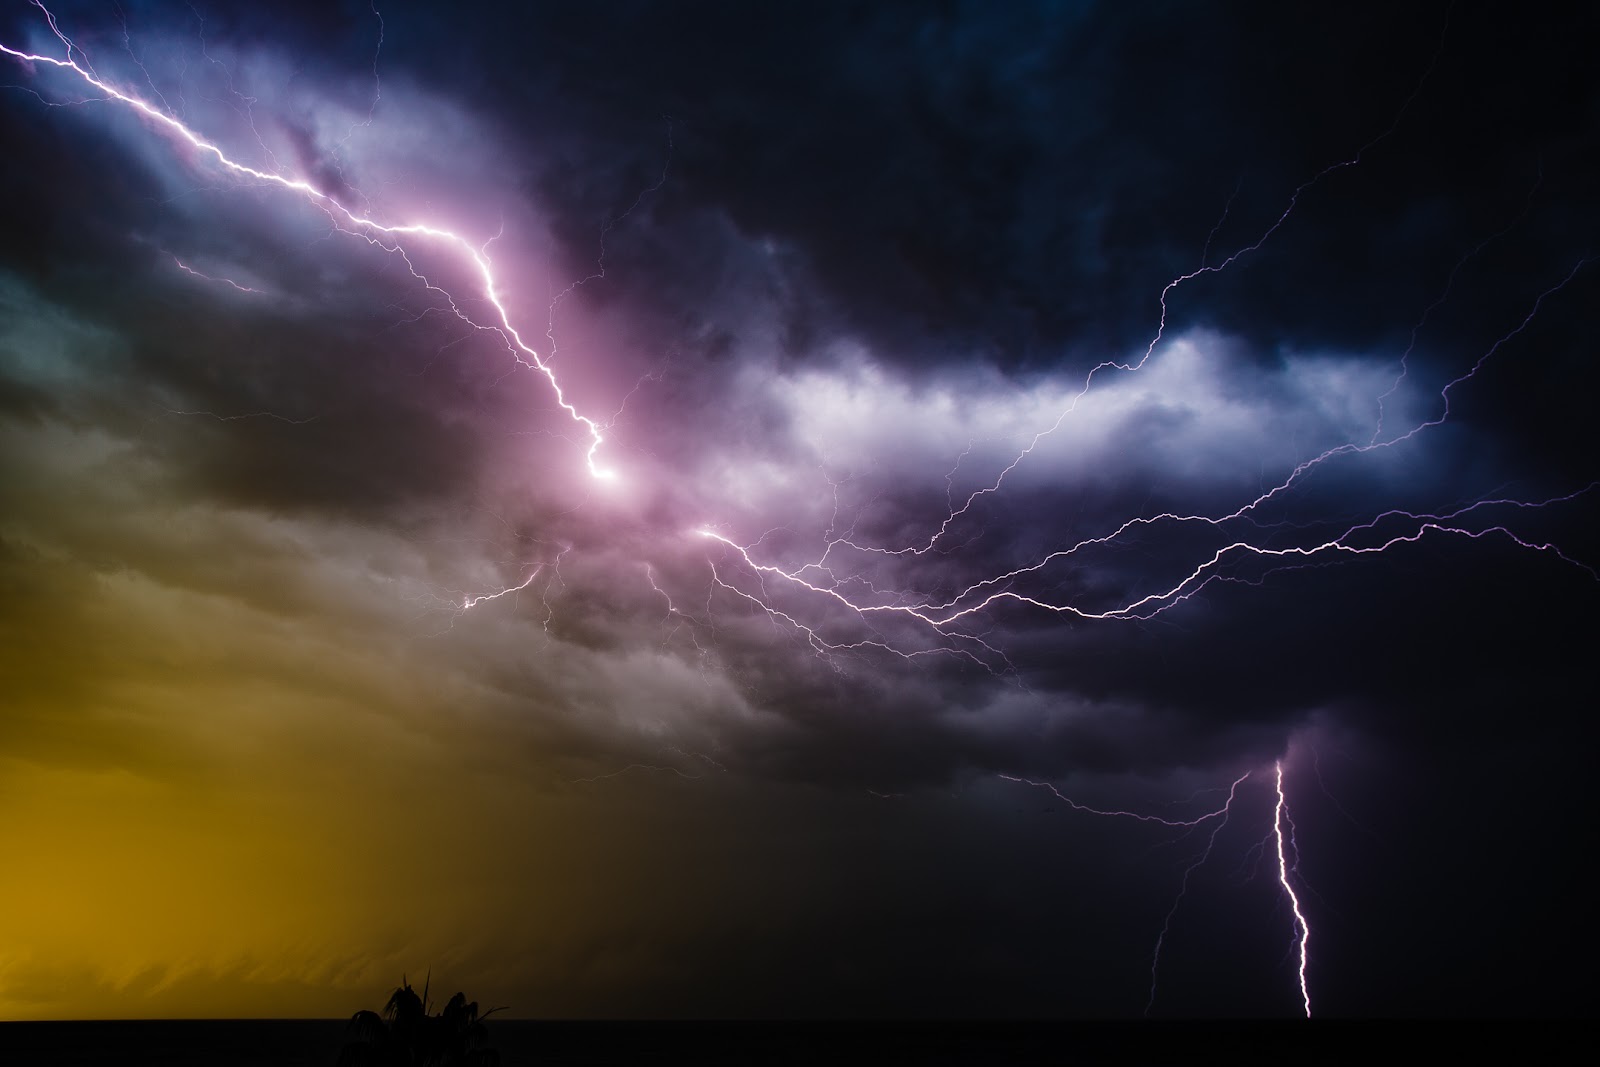
For me this did not reflect my personal experience as it feels too dark and brooding when it was actually highly energetic and intense. This feeling is also mostly due to over using the Dehaze slider. It is a cool look but later I felt I wanted it to be more natural.
I could shoot lighting everyday for the rest of my life and still love it. I love zooming in at 200% and looking super close at lightning. It is awe-inspiring for me. And so, so beautiful. I did 263 frames over 45 minutes. Maybe 30 with strikes!
I now have weather apps that forewarn me of lightning in my area so next time I will be ready to go…as long as I can stay safely on my balcony drinking coffee 8).
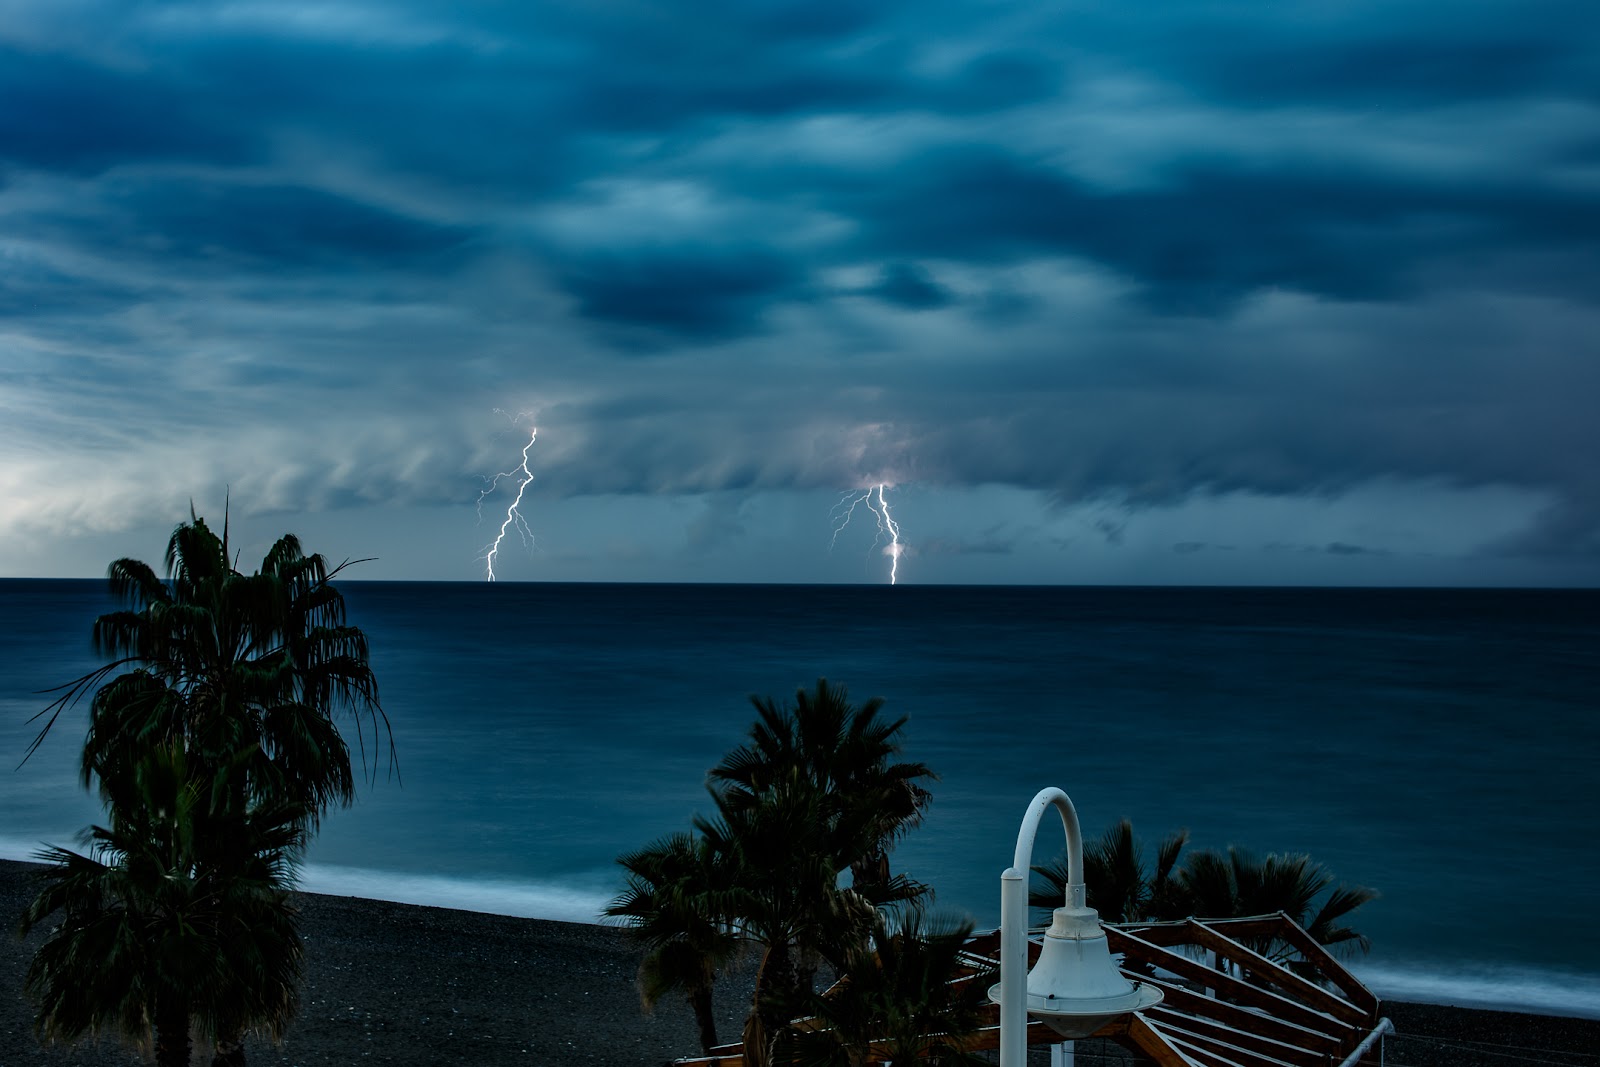
A couple of the last strikes of the morning. It was amazing how the colour dramatically cooled at sunrise. Strange, strange weather but I live for it.
I’d love to know what you think of this, or if you have questions ask them here on my blog and I’ll answer them.
Have a great day,
Anthony and Diana